First-session field guide
SAND Raiders of Sophie Beginner Guide: First Runs & Safe Extraction
This SAND Raiders of Sophie beginner guide turns the first three expeditions into a repeatable loop: prepare a modest Trampler, set one objective, read the desert, and leave with useful loot before risk compounds.

Quick answer: Start with a short Voyage objective, not a full-map treasure hunt. Put fuel, ammunition, one repair option, and open storage on the Trampler, then choose a nearby point of interest and a fallback extraction route. Loot containers methodically, avoid noisy fights that do not improve the run, and leave when the Trampler is damaged, the hold is useful, or the route becomes uncertain. The SAND Raiders of Sophie beginner guide below explains how to repeat that decision instead of relying on luck.
What a good first run looks like
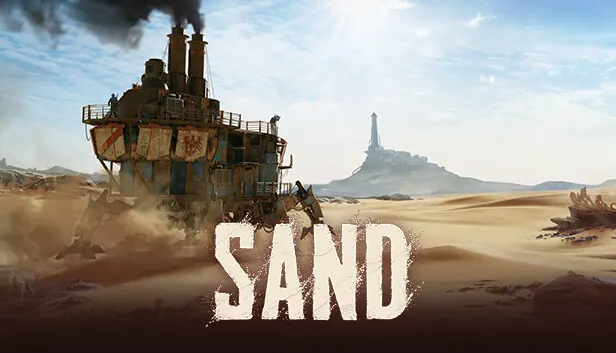
A new player often loses time by treating every expedition as a test of courage. SAND combines open-world travel, PvPvE pressure, physical loot, and a walking Trampler base. Those systems create several decisions at once: what to carry, where to stop, when to fight, and when to turn back. A good first run reduces those decisions until you can see why a result happened.
Your first success condition is not rare loot or a perfect kill count. It is a clean return with enough information to improve the next deployment. You should know which route you took, which container types were worth the time, how much damage your Trampler absorbed, and what warning made you leave. Read this SAND Raiders of Sophie beginner guide as a field notebook: each answer should make the next run more deliberate. That record gives the next run a purpose and keeps one bad encounter from becoming a verdict on your build.
Prepare the Trampler before deployment
Preparation is a risk budget. Bring enough to complete one modest job and return, while leaving room for the items that make the trip worthwhile. A heavy experimental loadout can look powerful in the hangar but become a liability when repair space, ammunition, or turning room is missing. Start with the simplest configuration you can explain to a teammate.
Check the Trampler from left to right before you launch: movement and power, weapons and ammunition, repair options, then storage. The exact names and values can change during Early Access, so the habit matters more than a frozen number. If a slot is empty, decide whether it is empty by design or because you forgot a basic resource.
Keep movement reliable
A working Trampler is your route, cover, storage, and escape plan. Favor a stable power and movement setup before adding a niche damage option. You need enough control to reverse, turn away from a bad angle, and reach a safer position after a surprise hit.
Preflight check: Test the controls in a quiet area and confirm that the crew knows how to stop, turn, and remount.
Pack a small combat reserve
Carry ammunition for the weapon you understand rather than filling every slot with experiments. A reserve lets you answer one necessary threat without turning a loot run into a prolonged duel. If you cannot explain why a weapon is on the loadout, leave it for a later comparison run.
Preflight check: Agree on the threat that deserves a fight and the threat that deserves a route change.
Protect room for useful loot
Storage is part of the objective. Empty space lets you choose instead of dropping a confirmed material for an unknown item. Keep repair supplies and mission-critical pieces separate from trade or experiment items so a hurried return does not consume your safety buffer.
Preflight check: Before launch, say what kind of loot the run is seeking and how much space it needs.

Follow the first expedition loop
The most useful SAND Raiders of Sophie tips are actions you can repeat. Use this five-step loop for the first run, then change one variable at a time so you can tell whether a better result came from the route, the loadout, or the decision to leave.
1. Choose Voyage and one nearby objective
Use the mode that gives you room to learn route reading and the Trampler's handling. Pick one visible point of interest, a container category, or a small resource goal. A single objective prevents the first run from turning into an inventory tour with no extraction plan. Mark the fallback route before the hold is full.
2. Arrive quietly and read the area
The engine, weapons, and movement all communicate your presence. Pause at the edge of an area, look for movement, listen for combat, and check whether a route has cover or a clear turn. Entering at full speed can save seconds but removes the information that would have prevented a bad engagement.
3. Loot with a rule
Open containers in a consistent order and compare the item with your objective before picking it up. Keep confirmed repair, fuel, ammunition, or crafting materials when they support the next run. Leave low-value clutter when it costs time, noise, or storage. Learning what you deliberately leave is part of learning the economy.
4. Treat combat as a cost
A fight can be correct when it protects an exit, secures a needed resource, or removes a threat that blocks the route. It is usually poor value when it only proves that your weapon works. After contact, check damage, ammunition, enemy position, and the distance to extraction. Do not let a winning exchange hide a losing route.
5. Leave at the first clear success
Once the objective is met, start the return while the Trampler is healthy and the route is legible. The extraction guide explains the exact interaction and timer; this page focuses on the decision to begin it. A modest haul delivered safely teaches more than a second objective lost because the run stayed open too long.
Read risk and choose when to extract
Extraction shooters punish a vague definition of success. Set a stop condition before you deploy, then let the condition override the urge to take one more fight. Useful stop conditions include completing the named objective, filling the planned loot space, taking meaningful Trampler damage, losing the known route, or hearing a storm or rival that changes the cost of waiting.
Do not confuse a quiet screen with a safe route. A rival may be outside the camera angle, a return path may be blocked, and a damaged system may turn a small detour into a crisis. The best decision is often to shorten the route and bank the information you have. This is how a SAND Raiders of Sophie beginner guide becomes a learning tool rather than a list of confident promises, and it is why the guide repeats the leave decision instead of treating extraction as an afterthought.
Green: objective and exit are clear
You have the planned item, enough movement and repair capacity, and a route that you can describe. Start the return. Extra loot is optional and should not replace the confirmed win.
Amber: the run is valuable but noisy
A rival, a loud fight, partial damage, or a longer detour has changed the plan. Stop opening new containers, move toward the fallback, and communicate the next turn. Do not add a second objective while the first is still at risk.
Red: the return is uncertain
You have lost the route, cannot answer the next threat, or are carrying loot that is no longer worth the exposure. Use the shortest known path, avoid curiosity stops, and accept a smaller outcome if it preserves the Trampler and your next deployment.
Recover from common first-run mistakes
Mistakes are useful when they leave a clear note. After a failed run, write one sentence about the first irreversible choice: the fight you accepted, the detour you took, the item you carried, or the moment you ignored the exit. Repair that one decision on the next run instead of replacing the entire build.
The goal is not to remove every surprise. It is to make the same surprise less expensive. Keep the tone factual when playing with a crew; blame produces silence, while a shared rule produces a better call the next time.
- Leaving with a full hold but no repair reserve: reserve one safety slot before collecting optional loot.
- Starting a fight because an enemy is visible: ask what the fight protects and what the return cost will be.
- Ignoring the Trampler while looting on foot: regroup before the next container and keep a clear mount path.
- Changing several settings after one loss: change one loadout, route, or timing variable so the lesson remains readable.
- Following an old video as if it were a patch note: confirm names, modes, and item behavior against current official information.
- Calling a run a failure because the rare item was absent: a safe extraction with route knowledge is a successful training result.
Plan the next three expeditions
The first three runs should answer different questions. Run one is about control and return. Run two tests a route or loot rule while keeping the same basic Trampler. Run three adds one deliberate pressure, such as a more ambitious point of interest, a crew role, or a different weapon. This progression keeps upgrades tied to evidence instead of impulse.
Link each result to the right specialist guide. Use the map page when the problem is route knowledge, the crafting page when the problem is material priority, and the weapons page when the problem is a role or range choice. If the client or connection behaves differently from the expected loop, check the server-status and crashing pages before rebuilding the entire setup. This SAND Raiders of Sophie beginner guide is the bridge between those specialist pages: it tells you which question to ask after each run.
Run one: make the loop boring
Use a short Voyage route, one objective, and a conservative loadout. Record the time you start returning, what you left behind, and whether the Trampler reached extraction in a state you can repeat.
Run two: test one route decision
Keep the core equipment stable and change only the point of interest or the order of containers. Compare the information gained with the extra travel and exposure. If the route is not better, you have still learned where the cost appears.
Run three: add one pressure
Try a crew callout, a different weapon family, or a slightly longer loop only after the first two returns are understandable. Set a hard extraction threshold before launch and stop at it, even when the run feels promising.
SAND Raiders of Sophie beginner guide FAQ
What should a new player do first in SAND Raiders of Sophie?
Prepare a simple Trampler, choose a short Voyage objective, learn one route, and extract with a small useful haul. The first goal is a repeatable expedition loop, not a rare item or a large fight.
Is Voyage the best mode for a first expedition?
Voyage is a sensible learning choice because it gives you room to practice movement, looting, communication, and extraction decisions before adding more pressure. Always check current official mode rules because Early Access systems can change.
How much loot should I carry before extracting?
Extract when the planned objective is complete or when the hold contains a meaningful upgrade, repair, fuel, ammunition, or crafting material. A full inventory is not a requirement; preserving the Trampler and the route is often more valuable.
Should beginners fight other players?
Fight when it protects your objective or exit and you understand the cost. Avoid fights that only add noise, damage, or distance to the route. Learning when not to engage is a core beginner skill.
What if I lose my first run?
Write down the first irreversible choice, then change one variable on the next deployment. Use a shorter route, a clearer stop condition, or a simpler loadout. One failed run is evidence, not proof that the game or your Trampler is impossible.
Which SAND guide should I read next?
Use the map guide for landmarks and route planning, the extraction guide for the interaction and timer, the Trampler guide for the mobile base, the crafting and weapons guides for progression choices, and the server-status guide for connection questions.
Sources and scope
The page uses official Steam and developer context for the Early Access setting and treats practical route advice as editorial guidance. Patch notes can change names, values, modes, or extraction rules, so verify current in-game prompts before committing rare resources.